Saturday, July 17, 2010

Pemasangan cerwin tweter(tweeter installation)

Kalau cerita pasal audio ni saya memang kurang berminat kerana saya lebih suka kepada engine performance.So kayuh pelan-pelan Bro lama-lama nanti boleh minat kot.Sistem audio yang saya tahu antaranya ialah sony,piooner,mowhawk(speker)…..?lah memang jahil saya pasal audio ni..ok kita mula sekarang.(If the talk about audio system I'm not so interested because I prefer the engine performance more and wiring make me headache.Ok Bro take it slow and steady probably we might love it later.. Audio system that I know of which is Sony, piooner, mowhawk (speker)…?..ha..haa. .i was really ignorant about the audio system.. ok we start now.)

Apa itu tweter?(What is tweter?)
Selalunya speker yg murah hanya dapat menghasilkan bunyi mid range yang baik tetapi gagal mengeluarkan bunyi yang berfrekuensi rendah dan tinggi.twiter dapat mengeluarkan bunyi yg berfrekunsi rendah dan tinggi dengan baik sekali dan kos nye juga berpatutan.kalau org putih kata bunyi krispi ,melayu kata bunyi keciis..kecisss..saya tak reti nak gambarkan bunyinye..hee..hee(Inexpensive Speker- usually only able to produce good mid range sounds but fails to produce high- low frequency capabilities.Adding surface-mount tweeter is alow cost way to add a crisp high end to cheap factory speaker not incorporating a tweeter..)

Tip untuk membeli tweter(Tips for buying tweeter)
  • Beli jenis dome(,KUBAH)jangan beli yang cones(segitiga) sebab dome bunyinya lebih bagus.(Purchase of dome (, dome) do not buy the cones (triangles) dome because it sounds better)
  • Jangan beli piezo tweeter(kurang respon pada frekuensi bunyi)(Do not buy a piezo tweeter( poor frequency response )
  • Yang gila kuasa digalakkan beli ferrofluids(For high power application,ferrofluid is recommended)
Kalau nak cerita pasal tweter ni memang banyak siap dangan formula lagi nanti baca pon boring,sampai takatni cukuplah janji boleh pasang dengan cara betul.If I want to write about twiteer is a lot,include the formula and ..bla..bla…but afraid u all feel bored,so I thaik as long we can connect the tweeter correctly is sufficient already.

 1.buka tweter lama,sambungkan negative twitter ke negative speker,positive tweter ke positive speaker.(Remove the old tweeter,connect(new) negative tweeter to negative speaker and(new) positive tweeter to positive speaker.)

sambungan wayer tweter                                 cerwin twetter 

Korang tengok cerwin tweter besar ,yang biasak punya kecil je.(As u can see cerwin twiteer is bigger than my original twiteer)
.
2.kalau nak bunyi lagi sedap ,diantara wayar positive speaker dan twiter pasangkan satu crossover(penapis bunyi).penyambungan lihat gambar dan wiring diagram(If you want to get a quality of sound put one crossover in between positive wiring speaker and tweeter .For connection just refer to picture and wiring diagram below.)

                                                          twitter wiring diagram(klik kat gambar untuk zoom)


crosover dipasang antara positive speaker dan positive twitter(install croosover inbetween speaker and tweeter at the positif wiring line)
crossover saya ni dah lama tapi masih ok,pakai semtara je nanti nak upgrade mohawk 2 way speaker pulak sebab bunyinya dah dikalahlan oleh tweter ni.(my old tweeter still in a good condition but later will change  when i upgrade my speaker)
3.cari tempat yang sesuai untuk melekatkan twiter,pilihan saya deshbord .jarak antara twitter dan speker jangan lebih dari 7 inci.kalau lebih akan mengurangkan kesan bunyinya.(Find a suitable place to attach the twitter,my choice is at deshbord.The distance between twiteer and speaker should not more then seven inch away or otherwise it will affect the quality of sound)
4.lekatkan belakang twiter dengan double site tape,lekatkan ke dashboard(stick a double side tape at the bottom of twitter and stick it to the dashboard)
lekat dengan duble site tape
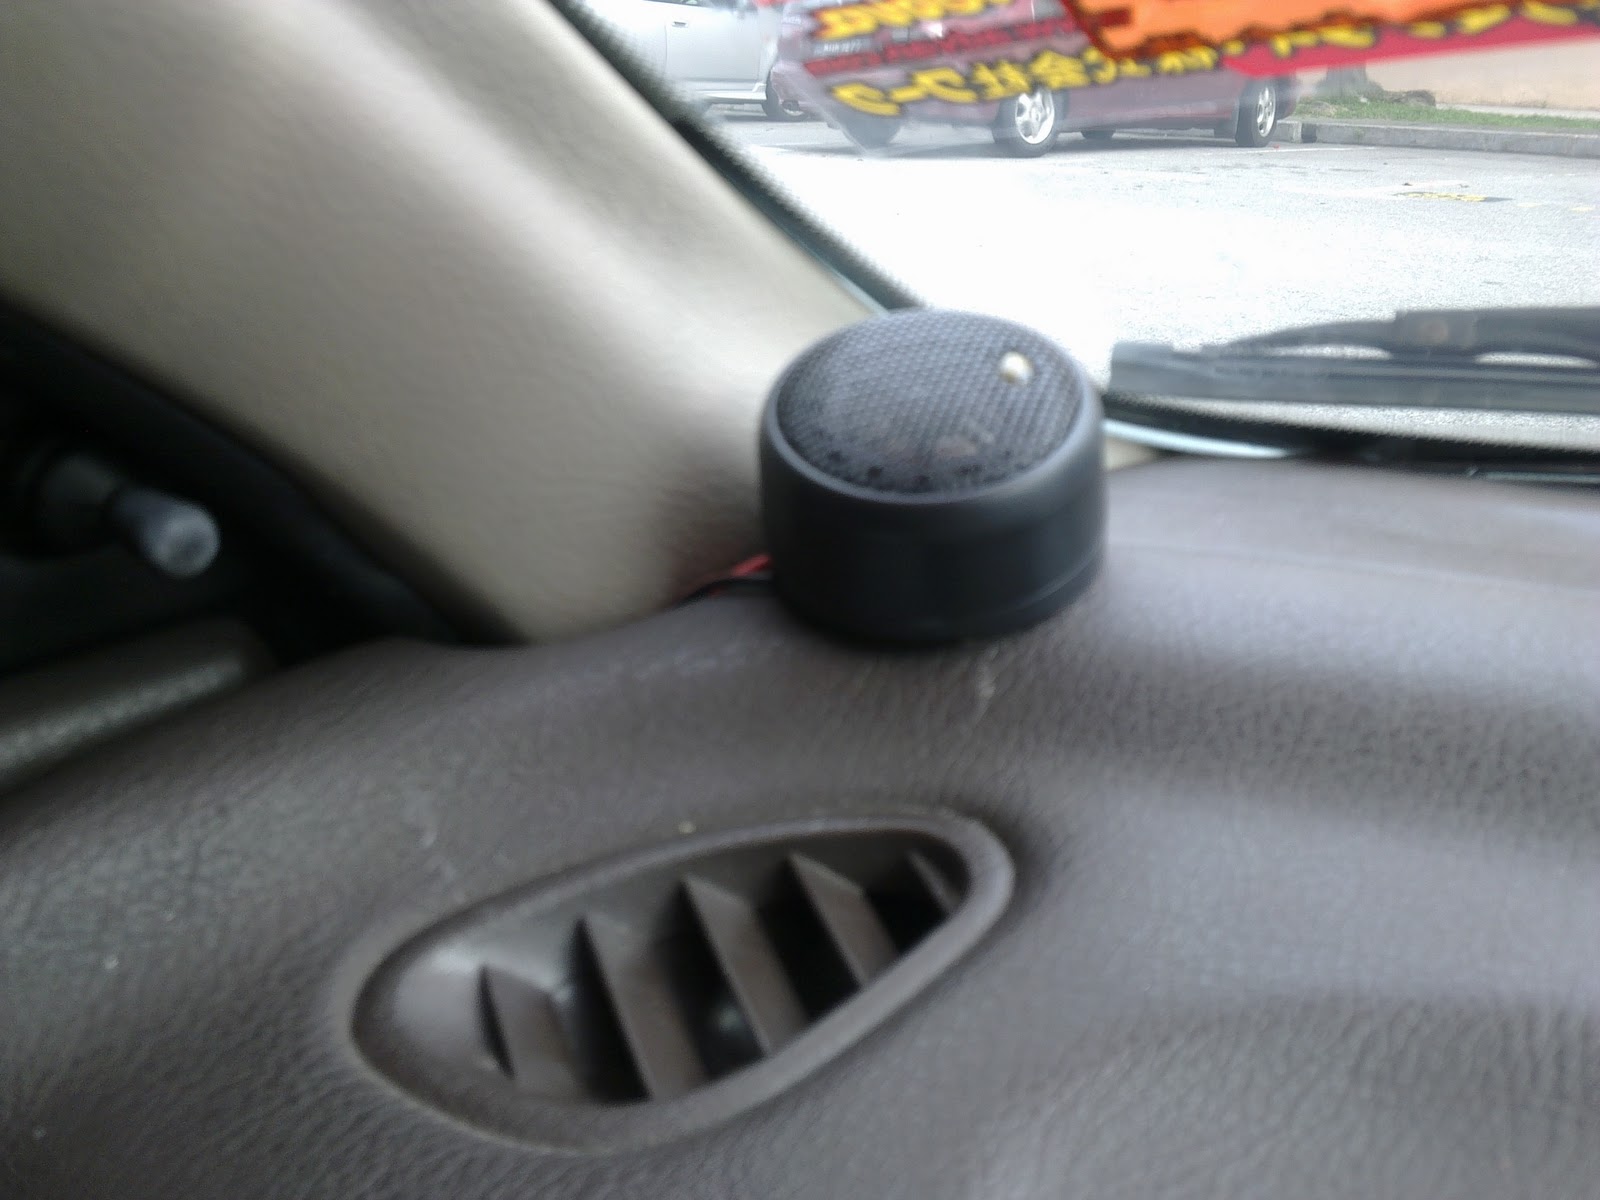

5.ok dah siap..apa lagi jom layan lagu herman tino,boleh tahan juga bunyi cerwin tweter ni tekejut juga dengan bunyi nya.bahagian belakang speker saya dah tukar 3 way pionner(1200w) power m belum masuk lagi.Wahh seronok gak main audio system ni yek kalau ada rejeki nanti saya tukar speker depan dengan mawhawk(2 ways) pulak,maklumlah Bro dah tengokkan saya punya speker depan tu malu den……(buat-buat tak Nampak je yek)(Ok all done,so let test this  twiteer.Ha!! Ha!! not bad this tweteer performance,my rear speaker  is 3ways pionner 1200w ,without power m connection,.right now i am happy with this setting probably i just need to replace  my front speaker  to balancethis new  tweeter.

*minggu lepas saya jumpa satu Bro kat shah Alam(Mohd Fauzi),Iswara oren kereta kebal sembang pasal kereta,dia minat audio system sesangat,dia kata dia dah habis dekat rm10ribu kat audio.Jadi saya minta kebenaran dgn bro ni untuk test dia punya sound system,sekali dia pasang itu radio ,tekejut den..apa taknya satu kereta begoncang.. mak oii macam ni pun ada ke(Dahsyat !!!tak tekato den)…rasanya kalau ada jantung problem tak boleh naik kete dia nih..compom masuk IJN nanti…sori Fauzi gurau je ye…

Diypomen facebook


Friday, July 9, 2010

PEMASANGAN JASMA BONET GAS LIFTER

Kali ni saya nak pasang bonet gas lifter untuk bonet kereta saya.Kalau dah minat buat diy ni memang selalu lah kene buka bonet engine ni.rasanya dah letih nak mengangkat bonet ni.Kalau pakai bende ni bonet akan terangkat sendiri dan tak perlu nak ditongkat lagi dan yang best tu tak lah risau bonet ni nak jatuh semasa saya membuat kerja kat bahagian engine.. (This time I want to install gas bonnet lifter to my car bonnet.Ohh..Because of frequently to open the bonnet than I thik this Is right choice for me to use this gadget.This lifter will push the bonnet automatically and the best thing is I wont fill worried anymore if the bonnet drop to me while I am working.)
jasma bonet gas lifter

Peralatan(tools)
spana saiz 10,12 dan 14(wrench size of 10.12 and 14 )
ok kita mula sekarang,kalau ada bantuan kawan lebih mudah tapi seorang pun masih boleh buat kerja ni.(ok we start now, if you have a friend to help is more easily, but alone still can manage this task)
1.Buka bonet kereta,tahan bonet dengan bar penahan bonet.(lift the car bonnet, hold the bonnet with bonnet retaining bar )
2.Mulakan pemasangan di bahagian yang kiri anda dahulu.(Start the installation on your left site first(location without bonnet retainer)
3.Buku skrew fender dahulu.(remove fender screw first.)


Wednesday, June 9, 2010

Membuka dan memasang sport stereng,(REMOVE AND INSTALL SPORT STEARING)

Membuka(To Remove stearing)
Sebelum membuka stereng,pastikan roda anda berada dalam kedudukan yg lurus(.Before removing the steering wheel, make sure that your wheel is in the stright position.)

1.Buka semua elen skru sehingga stering terbuka.(To remove stearing from the hub you need to lossen  all the allen screw)

2.untuk melepaskan stereng dari horn,terlebih dahulu buka wayaring di bahagian horn
.(To release the stearing from the horn,firstly you need to release the horn wiring)


cabut wayar dari horn(Pull wire from the horN)
3.Stereng sudah dibuka dari hubnyaStereng hub.(Stearing is removed from the steering hub.)


stearing hub
Memasang(Installing)

1.masukan wayar horn dicelah lubang stereng dan sambungkan terus ke horn.(Insert the wire through the stearing whole and connect directly to the horn)


2.pasangkan stereng cover dan pasang semua skru,ketatkan skru secukupnya (install the steering wheel cover and  tighten all the screws securely.)


3.Test horn anda…selesai (test the horn ...completed)


Saturday, May 22, 2010

DIY MEMBUKA DAN MEMASANG MENTOL HADAPAN PROJECTOR HEAD LAMP(REMOVE AND REPLACING BULB FROM PROJECTOR HEAD LAMP)

1. Mentol depan belah kiri dah terbakar sebulan tak sempat nak tukar.Petang ni den ado masa nak tokar.Projector lamp ni susah sikit nak buka dia tak sama dengan head lamp biasa maklumlah dia banyak mentol,tapi tak lah sesusah mana kalau kita sabar sikit..ok kita mula sekarang..(my projector head lamp was burned so its time to do diy again.

Peralatan(Tools needed)

Tangan dengan screw driver aje(screwdriver)

1.Buka breket Rellay dahulu kerana ia menghalang mentol dari ditarik keluar.(open rellay bracket first cause it blocking our hand from pulling the rubber cover out.)

kotak rellay(Rellay box)


buka skru(remove screw)


buka skru(remove screw)


2.Tarik keluar cover getah dari head lamp(Pull out the rubber cover from head lamp.)


Tarik cover getah keluar(Pull out the rubber cover)


cover dah dibuka(removed cover)

3.Cabut wayar mentol(pull the wiring connection from the bulb)

Monday, April 19, 2010

CARA PEMASANGAN RADIO player KERETA ( car stereo instalation)

keselamatan(safety)

Before performing any task involving electrical components in your vehicle,make sure to first disconnect the negative battery terminal cable.If you bypass this step you run the risk of creating a short in the system,damaging the components and wiring of your vehicle.(Sebelum memulakan penyambungan wayar buka kabel negative bateri dahulu,tujuanya adalah untuk mengelakan berlakunya kejadian litar pintas semasa penyambungan wayar sedang dilakukan.)


peralatan.(tool)
=elekterik tape(electrical tape)

=pemotong wayar(wire cutter)

.after understanding entire audio wiring track in your car,then you can persued installation work,if you uncertain do not continue because of errors in wiring cause damaging your stereo.Setelah memahami keseluruhan litar radio yang baru dan litar audio dari kereta anda,maka bolehlah kerja pemasangan boleh diteruskan.Sekiranya anda tidak pasti atau was-was sebaiknya jangan diteruskan kerana penyambungan yang salah akan merosakkan radio anda


Pull out you factory stereo,remove wire entena,speaker and power supply.(cabut radio lama anda dari tempatnya ,cabut wayar entena,wayar speker dan wayar power supply.)


radio dah dicabut,wiring radio dan entena, (audio wiring from the car)
sambung wayar radio baru ke adapter wiring kereta. (connect new wiring stereo to the correct wiring from the car)


wiring bateri,ground dan accesory(wiring battery,ground and accesory)

Saturday, April 17, 2010

Pivot Raizin volt stabilizer installation(memasang pivot raizin volt stabilizer)

Warning ==install safely and surely by following these instruction,please be very careful about connecting the positive and negative cables,mixing these up will cause damage to the product. "amaran"hati-hati semasa pemasangan alat ini ke terminal positive dan terminal negative,kesilapan penyambungan keterminal boleh merosakkan alat ini.


1.Remove the negative cable from negative terminal battery.Mula -mula buka cable di negative bateri kereta.

2.Connect positive raizin cable to the positive battery terminal and tighten the nut securely.Sambungkan cable positive raizin ke terminal positive bateri,ketatkan skru secukupnya.
3.Properly connect the negative cable to the negative battery.connect the negative cable raizin to the terminal

Saturday, April 3, 2010

carefully when driving with spare tyre(berhati-hati memandu semasa menggunakan tayar spare)

-Spare tyre only can used for temporary and emegency purpose .This tyre cannot be used for daily drive,it dangerous.(Spare tayar hanya boleh digunakan untuk sementara waktu sahaja)

-Read the instruction how to used this spare tyre,it can be found from car manual book or it stated at the rear bonnet near the spare tyre.(Baca peraturan menggunakan tayar spaire,ada tercatat di manual book atau tertulis dibonet belakang berhampiran tayar.)

Monday, March 22, 2010

Proton akan menghasilkan engine campro turbo/proton will release new turbo engine campro.

Now people busy talking about proton will produce new engine campro turbo .my neighbour work at proton give me some information about this engine.He told me that r&d department now are busy testing of this engine extensively.Modified has been done to the engine so it can accept high pressure from the turbo exzos.At the engine block ,the diameter of water jacket changed to a bigger size so it can improve cooling system more efficient.Possibility this engine will be install to proton exora mpv.. Sekarang ni. tengah heboh orang bercerita pasal proton nak pakai engine turbo.Jiran saya kerja kat proton bagi information sikit dia kata r & d tengah sebok test engine ni.pengubahsuian perlu dilakukan keatas engine supaya dapat menahan tekanan yang dihasilkan dari turbin exzos.Lubang water jacket di engine blok juga sudah dibesarkan supaya dapat menyejukkan engine dengan lebih efficent.engine turbo ni katanya nak disumbat kat mpv exora tu.

spesifikasi engine
1.6 liter campro turbo/cps turbo engine =150 horsepower


Kisah pencipta lampu

.Salam Bro post kali saja nak post satu fakta tentang seorang saintis ni =Thomas Edison adalah saintis pertama yang mencipta cara menghasilkan cahaya melalui tenaga elektrik.Apa yang menarik adalah beliau menemui 999 cara salah dan satu cara yang betu bagi mencipta sebuah mentol.Ini adalah sikap positif yang perlu bagi setiap orang.Sekali gagal tidak selamanya gagal..so rajin-rajin lah berusaha dan jangan kenal putus asa..

Sunday, February 14, 2010

REMOVE AND ISNTALLATION OF RADIATOR FAN.(MEMBUKA DAN MEMASANG KIPAS RADIATOR)

Last friday when i was driving to Sunway Pyrimid suddenly my engine tempreture meter reach to 120celcius ,quickly i stop my car check the engine and found radiator fan not spinning.I was lucky because my engine didn't overheat yet,but i can heard boiling sound came out from radiator.After rest for half an hour i continue drive to look for workshop unfortunetly all workshop was closed,so i have no choices,i have to sattle this problem alone with myself.First thing i do is check fuse and its ok then i do direct connection fan to battery and found fan not spinning so i cant do anything more...my solution is wait until night when the road is free i drive slowly and safetly back to my home.( Hari Jumaat lepas semasa nak pergi sunway pyramid tiba-tiba tengok meter tempreture dah sampai 120celcius ,mak oi problem ni bawak budak kecik pulak nih,selepas tol saya berhenti buka bonet tengok kipas radiator dah kong.engine panas ,dekat radiator boleh dengar air mengelegak ,nasib baik air tak memancut keluar(pakai penutup radiator japan ,tahan lasak penutup radiator ni tahan dengan high pressure).Saya lepak setengah jam pas tu pandu terus masuk pyramid ,bengkel semua dah tutup masak aku kali ni.Anak ngan maknya suruh lepak kat pyramid saya cuba nak setelkan kipas ni tension tul.Perkara pertama check fius ok,pas tu buat direct connection betri ke kipas ,tak jalan juga maka betoi lah kipas ni dah ko.(Bro nak buat direct kipas pusing mesti hati-hati OK,PANASSS,KIPAS BOLEH PUSING TIBA-TIBA JAGA JARI DGN TANGAN ANDA).sO saya tak boleh nak buat apa-apa tungu malam sikit jalan clear baru saya gerak,pahem-pahem lah SUN WAY TOL jEm tahap gile,kalau gua lalu time jEm masti kantoi kereta ni.pukul 8 malam saya gerak ,selamat sampai kerumah,ambik masa satu jam..)

1.before starting your work makesure the engine is not hot.(Sebelum memulakan kerja pastikan engine kereta anda tidak panas.)


2.Remove all bolt that hold the radiator fan(Buka keempat-empat bolt yang memegang kipas radiator.)


Thursday, February 11, 2010

3 POINTS ULTRA RACING REAR BAR INSTALLATION FOR PROTON GEN2,PERSONA AND WAJA(MEMASANG 3 POINTS BAR BELAKANG PROTON GEN 2,PERSONA DAN WAJA)


3 POINTS REAR BAR

1.Remove all nuts from both suspension(BUKU DUA NUT ABSORBER ,KIRI DAN KANAN.)


2.Fix the bar to the suspension ,put on the nuts back but done tighten it first.(PASANG KAN BAR DI TEMPAT YANG SEPATUTNYA,PASANG SEMULA NUT ABSORBER,TAPI JANGAN DIKETATKAN NUT TERSEBUT DAHALU.)

Sunday, January 24, 2010

DIY REPLACE ROCKER COVER GASKET(diy menukar rocker cover gasket)


1. Before you remove the rocker cover you must pull out two hose that attached to it.Loosen all the bolt and remove the cover,if it stuck use rubber hammer and hit at the edges of cover slowly until it loose.(sebelum membuka rocker cover, paip crancase dan brether paip hendalah dibuka terlebih dahulu kemudian Buka skrew rocker cover,ada enam kesemuanya.buka rocker cover ,sekiranya ketat ketuk disisi cover degan tukul getah perlahan-lahan sehinga ia longgar.)


2.Rocker cover has been removed out from the head.Used scraper to Clean all trace and old gasket that stick to head and cover area(Rocker cover sudah dibuka,bersihkan segala kotoran atau gasket lama yang melekat dikawasa head dan dikawasan rocker cover.)

Sunday, December 13, 2009

Fuel pump(carbureted model)-removel and instalation (diy membuka dam memasang mekanikal petrol pam)


1.This pump is leaked it caused oil from engine head dirty the belt and compressor air con.(pam minyak ni dah bocor ,minyak hitam dari head dah keluar mengotorkan belting dan compressor aicond.)


All hoses removed from pump.(paiping di pam minyak dah dibuka.)

Thursday, December 10, 2009

.TURBO TIMER INSTALLATION /DIY MEMASANG TURBO TIMER.


turbo timer
1.Read first the instruction given by the manufacturer before you installing this gadget.
a)Red=forever positive
b)Yellow=for key switch second positive=electronic assay
c)blue=key switch engine
d)black=negative
e)brown=hand brea
Sebelum memasang baca dahalu arahan yang yang dibekalkan oleh pengilang merah=wiring terus dari punca positive beteri(red =forever positive)
kuning=wiring kunci eksesori(yellow=for key switch second positive=electronic assay)biru=wiring kunci engine(blue=key switch engine)
hitam/black =negative
brown/perang=hand brake
switch cover has been remove(switch cover sudah dibuka) test lamp

2.Remove switch cover so you can make a wire connection more easy.Here i was stucked because i dont have a car wiring diagram but dont worry we can use the test lamp to help us to identify them.Mark all the identified wire.( buka cover switch supaya anda dapat membuat sambungan wayar disitu.kat sini saya dah stuck tak ada gambarajah wiring kereta , jangan risau kita boleh gunakan test lamp untuk mengecam setiap satu wayar tersebut.)
aligator clip(aligator klip )


PERHATIAN=


Kalau boleh semasa mengesan wayar gunakan voltmeter test(,alat ini boleh dibeli kat hardware harganya sekitar rm20 ke rm40) kerana alat ni arusnya tak sekuat arus dari test lamp.Jangan gunakan test lamp untuk menguji peralatan elektronik kereta anda kerana arus dari mentol test lamp kadang-kadang boleh melebihi 12volt dan akan merosakan peralatan elektronik yang berhampiran.BRO SAYA GUNAKAN ALAT NI SEBAB IA MUDAH UNTUK SAYA ,LAGI PUN KERETA SAYA TAK DE ECM (COMPUTER BOX),TAPI KALAU UNTUK NEW BEGINER SEBAIKNYA GUNALAH VOLT METER.


3.How to use the test lamp=alligator clip can be connect to anypart of car body,the needle is injected in to the wire for identify.Turn the switch on one by one and identify them.Mark all the identified wire.cara menggunakan test lamp=aligator klip boleh disambung dimana -mana body kereta,bahagian jarum dicucuk ke dalam wayar yang hendak dikesan.putar kunci switch satu persatu dan test wayar.(BILA MENTOL MENYALA TERUS CABUT TEST LAMP DARI WAYAR,KALAU MENTOL MENYALA TERLALU LAMA ,ARUS DARI MENTOL BOLEH MENGALIR KE PERALATAN ELEKTRONIK YANG BERHAMPIRAN DAN BERKEMUNGKINAN MEROSAKANNYA.)tandakan wayar yg telah dikenal pasti satu persatu.

4.Before starting your work please open negative battery source first .This is to avoid any short circuit occurrence.(sebelum memulakan penyambungan buka punca negative bateri terlabih dahulu untuk mengelakan sebarang kejadian litar pintas.) 5.Open the switch connector so connection task is more easy to do(buka conector suis supaya anda mudah membuat sambungan.) 6.One of the wire from adaptor is connected to another wire from switch.All togather is three wire ,connect them one by one and tape the connection with electrical tape securely.(adaptor dari turbo timer sedang disambung dgn salah satu wire suis,semuanya ada tiga wayar.so selesaikan semuanya dan tapekan sambungan sekemas-kemasnya.0
7.connect the adaptor to turbo timer and connect back the wiring switch(sambungan adaptor tadi ke turbo timer dan sambung semula conector ke punca suis.)
hand break switch(suis hand break )

make one connection to hand break switch(buat sambungan disuis hand break )


tape wire securely,if can solder it.(tape wayar kemas-kemas kalau boleh shoulder. )

8.Remove hand break cover and make connection at the hand break switch.If you skip this the timer still can work.Many people skip this procedure but for saftey purpose is batter for you to do the connection.(buka cover hand break dan buat sambungan di suis hand break,kalau tak sambung pun timer boleh berfungsi tapi untuk saftey baik sambung bukan susah pun. )


9.Last step is connect negative wire to car body(.akhir sekali sambungkan wayar negative kemana -mana body.)
10.Re-connect the negative battery source and set turbo timmer according to engine type or the timer you like to hold.(sambungkan negative bateri semula dan set turbo timer mengikut kesukaan anda.selesai )


diypomen facebook


Thursday, October 22, 2009

JASMA LIGHTWEIGHT RACING CRANK PULLEY


fetures

  • light weight


  • made by billet aluminium


  • more horsepower and torque
  • quicker throttle respone
  • just plug and play no maintanance needed
  • save petrol


diypomen facebook


012-9720635

performance part catalogue

performance part catalogue
car performance part

LinkWithin

Related Posts with Thumbnails